Benchtop Design
Designing a Laminate Benchtop
Much of the mystery has been taken from modern cabinetmaking. Most kitchens are built in a modular fashion from a series of drawer and cupboard base units. Design and installation is relatively straight forward – until you get to the benchtop….
Benchtop design can still seem like a dark art. But, it doesn’t have to be so, as long as you are aware of the process to follow and the various allowances that that need to be made. This page has been set up as a resource for DIY rennovators and also those tradies who are only occasional users of laminate. If you can’t find the answers to all your questions here then feel free to give us a call or send an email.
Laminate colour and finish. You have probably chosen your colour before you got to this page but in case you haven’t here are a few things to consider…
We can obviously offer our best pricing when we supply a benchtop made from Modecor Laminate. Our range is small but carefully chosen to follow key design trends. We aim to have a range enables 80% of prospective customers to find something they like. However, we understand that some clients will not find something they like on the Modecor range so we also supply custom made benchtops in other brands of laminate. Price will vary depending on the brand chosen (price has nothing to do with quality when it comes to laminate) and could be up to 20% higher than a Modecor benchtop.
Designing a Replacement Benchtop.
If you are replacing on an old benchtop like for like, the measure up is straight forward. Measure the old benchtop as closely as you can making allowance as far as possible for the thickness of glass or tile splashbacks that may be overhanging the old benchtop (usually 5 – 10mm). If you decide to make small design changes – for instance you may wish to add some extra overhang to the breakfast bar for more legroom – make sure you consider how this change affects the rest of the design.
Designing A New Benchtop for a New Kitchen.
First and foremost is to make sure you allow adequate coverage and overhang of the cabinets that you install.
Benchtop Width: The standard benchtop width in Australia is 600mm. As a result most cabinets are made at a width of 560-570mm. Once assembled with a door that is either 16mm or 18mm thick and some small working gaps, the complete unit is usually 580-590mm. So a 600mm benchtop will provide a 10 -20mm overhang. It is worth sticking to the standard 600mm size as most raw materials are optimised for this size. The effect is that a 610mm benchtop will cost around 10 – 15% more than a 600mm benchtop even though its less than 2% bigger because it forces us to waste a lot of material.
Length: As a general rule the outside dimensions will be the important ones – especially for an L shape or C shaped kitchen. If you get the outside dimensions correct, all other dimensions will become a function of the width and join position. If you look at the some of the design examples on the website you will see that the length dimensions are always specified from the outside.
When specifying length make sure you allow for end panel thickness and overhang. As a simple example say you need an island benchtop to cover 2 adjoining cabinets that are 600mm wide. If each cabinet has a 16mm decorative panel attached to its outside, then the total length to be covered will be 16mm+600mm+600mm+16mm = 1232mm. If you then want a 10mm overhang at each end you need to specifiy your benchtop at 1252mm.
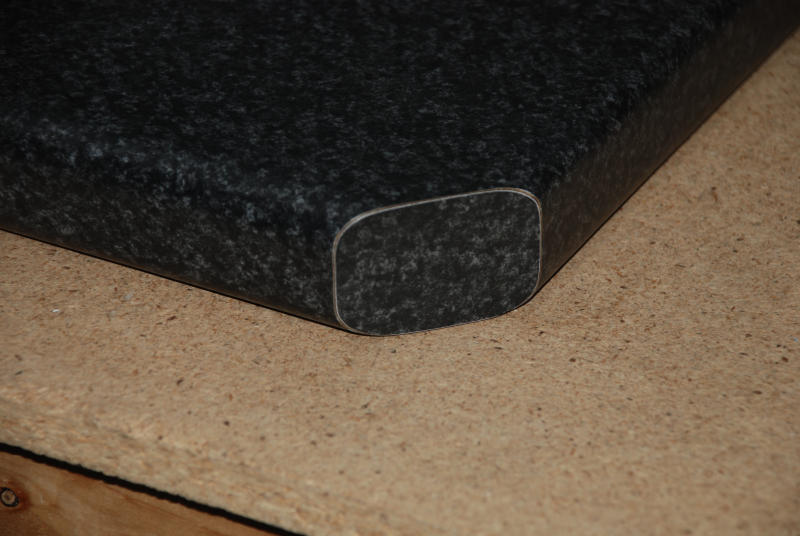
Forgetting to allow for end panels is one of the easiest and most common mistakes in Benchtop design. Another caution is the use of postformed ends with corner caps. The corner caps will cut the corners at 45° and may expose the cabinet corner if extra length allowance is not made.
Substrate Type and Thickness. The majority of laminate benchtops are made using 32mm Moisture Resistant (MR) Particleboard. The final thickness with laminate glued down is approx 33mm. 38mm is also popular, other thicknesses are possible but will tend to drive the cost up.
Sink/Stove cutouts
Most sink and stove manufacturers will specify the size of the cut out required. As a guide cutouts usually sit 8 – 10 mm inside the edge of the appliance. The majority of stove cutouts are relatively square but sinks will often have curved sides or a large corner radius.
So, it is possible to do the cutouts during the benchtop manufacturing but you have to be sure of the location of the hole in relation to plumbing and cabinetry etc, and the required size and shape. New appliances will come with a cut out specification or template (or we can download from the manufacturers website). But if you are re-using old appliances then we (or you) need to use the appliance as a template.
If there are uncertainties of location or size – as often happens in DIY renovations. We recommend that you leave the cutout until after you have installed the benchtop then do it yourself. In most cases you’ll only need a drill, a jigsaw, and the correct jigsaw blade.


